
Windows installation media is necessary when installing Windows on a new computer or reinstalling the operating system on an existing system.
This article explains in detail the role of Windows installation media, how to create it, and how to use it.
- Installation media refers to a USB flash drive or DVD that contains the files needed to install the operating system (OS)
- Windows installation media is required when installing or reinstalling the OS
- It is possible to create installation media by yourself
- A separate license is required in that case
- A USB flash drive with at least 8GB of capacity is needed
This article also explains general information about the OS, such as types, versions, editions, types of installation media, and license formats.
≫ Related article: How to Choose an OS for a Custom PC [Performance / Features / Compatibility]
Select PC parts and online stores to instantly generate an estimate, check compatibility, and calculate power requirements. You can save up to five different builds, making it easy to try out multiple configurations.
≫ Tool:PC Parts Estimation & Compatibility Check Tool
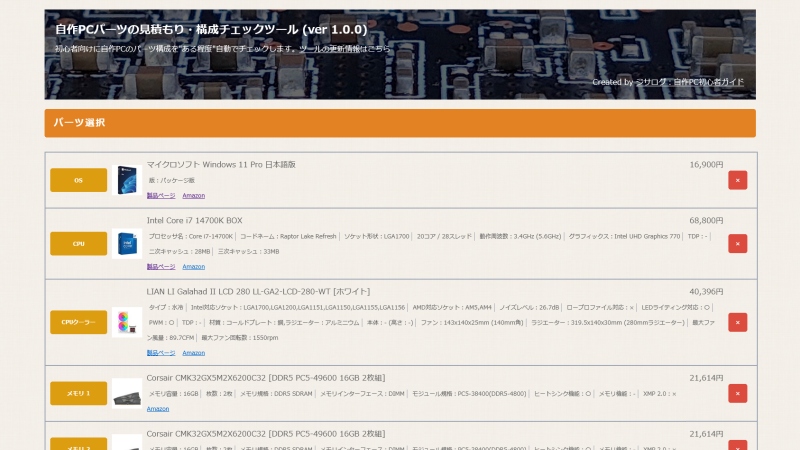
Table of Contents
About Windows Installation Media
Let’s first look at the basics of what Windows installation media is.
What is Windows OS Installation Media?
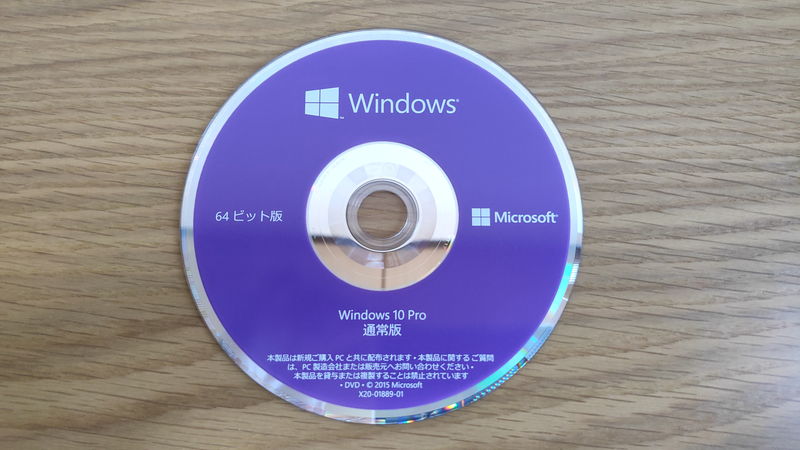
Installation media refers to a USB flash drive or DVD that contains the files needed to install Windows.
When purchasing the standard (package) version of Windows, a DVD is included, which is the installation media.
Installation media is used to install the Windows OS on a computer. Sometimes it is a USB flash drive instead of a DVD, and it is also possible to create one yourself if needed.
When Creating Windows Installation Media Yourself
The main cases for creating Windows installation media yourself are as follows:
- When only the license is purchased
- When already owning a license
- When a DVD is included but the computer does not have an optical drive and a USB flash drive is preferred
When purchasing Windows OS, the standard version comes with installation media such as a DVD or USB flash drive. However, if only the license version is purchased, installation media is not included, so it is necessary to create it yourself.
Also, if the installation media is lost when reusing Windows OS from a previously purchased or custom-built PC, or if a DVD is included but the computer does not have an optical drive, it is possible to create installation media yourself to install Windows.
A Separate Windows License is Required
To install Windows OS, both installation media and a license are required.
When purchasing the package (standard) version, both are included, but if only the license version is purchased or if a license key is already owned, separate installation media is needed.
The installation media itself only contains the files needed to install Windows and does not provide the rights to use the license.
A license key proves permission to use genuine Windows and is usually provided when purchasing Windows.
As explained later, the installation media itself can be created for free by downloading the data from the official website.
![]() Ken
Ken
What You Need is a USB Flash Drive
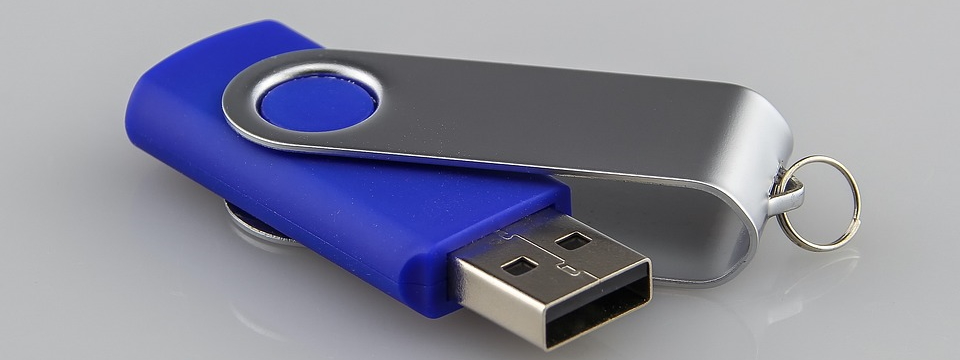
To create Windows installation media, USB Memory or DVD is required.
In the past, many computers had optical drives, so DVDs were often used. However, recently, the use of DVDs has decreased, and fewer computers come with optical drives.
Therefore, nowadays, it is common to use a USB flash drive to create installation media.
![]() Ken
Ken
A USB flash drive with at least 8GB of capacity is required, so make sure to prepare a USB flash drive with enough space.
Many recent USB flash drives have 16GB or more, so there should be no problem with capacity.
How to Create Windows Installation Media
This section explains the steps to create Windows installation media.
The general steps are as follows:
Here, select the type of media, etc.
The Windows installation media will be created according to the selected options.
Let’s look at the detailed steps using Windows 11 as an example.
Download the Tool from the Official Website

To create Windows installation media, first download the tool from the official Microsoft website.
Download the necessary data from the “Create Windows 11 Installation Media” section under “Download“.
Save this file on the PC, not on the prepared USB flash drive.
After running the tool, select the USB flash drive and extract the data to it.
The data on the USB flash drive will be erased automatically, so use an empty USB flash drive.
Run and Set Up the Tool
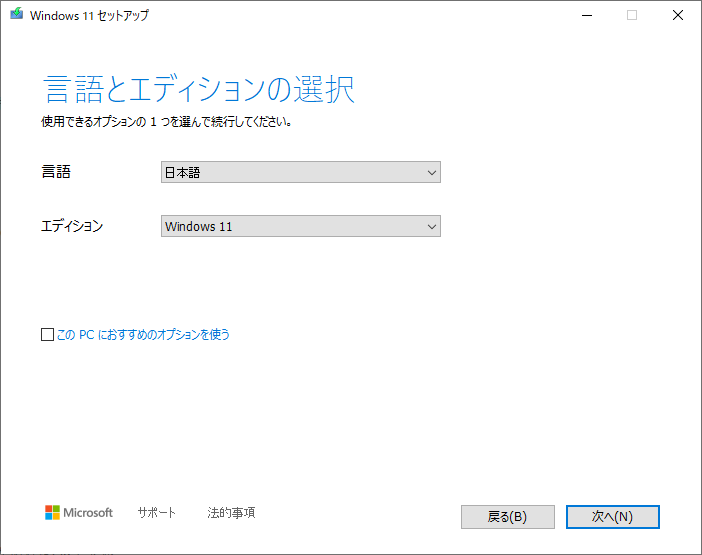
Run the downloaded tool and follow the on-screen instructions.
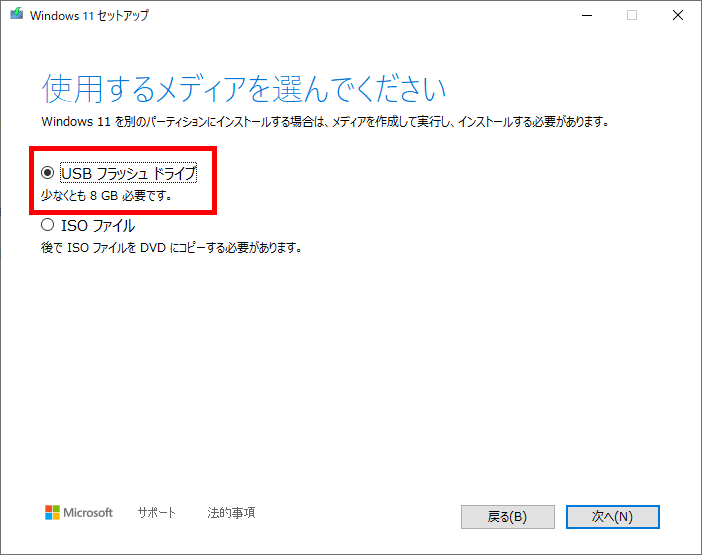

Here, select the type of media (USB flash drive or DVD), and choose “USB flash drive“.
Next, select the prepared USB flash drive when prompted.
Create the Installation Media
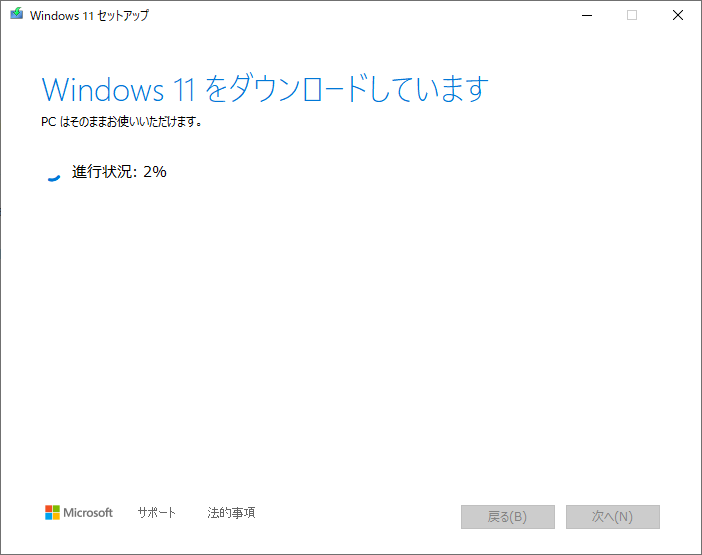
Once the settings are complete, a message such as “Downloading Windows 11” will appear along with a progress bar. Wait until it is finished.
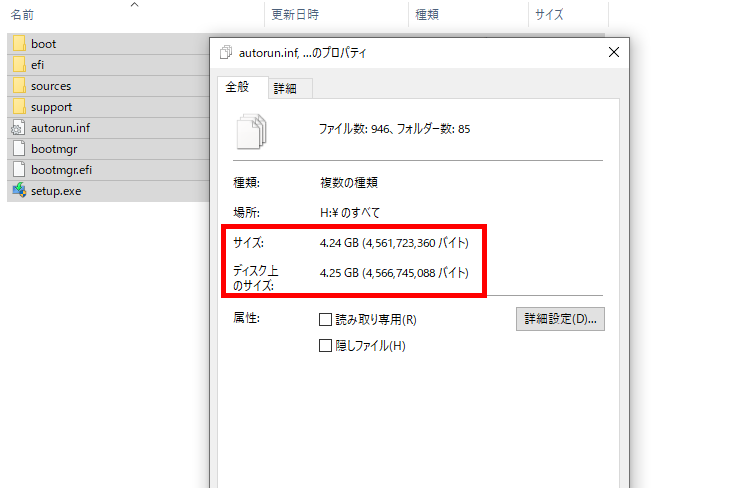
The size is about 4GB, so an 8GB USB flash drive is sufficient.
The download time depends on the download speed of the internet connection, but it usually takes about 5 to 10 minutes.
Although there is some waiting time, the operation itself is very simple.
How to Use and Boot from Windows Installation Media
This section explains the steps to install the OS using Windows installation media.
The general steps are as follows:
The key varies depending on the manufacturer and model.
Connect the USB Flash Drive to the PC
First, connect the USB flash drive with the installation media before turning on the PC.
When changing the boot device priority in the BIOS/UEFI screen immediately after starting the PC, it is necessary to select the USB flash drive, so connect it in advance.
![]() Ken
Ken
Turn on the PC and Enter BIOS/UEFI
To change the boot device priority, it is necessary to enter the BIOS/UEFI.
To enter the BIOS/UEFI, press a specific key immediately after turning on the PC.
Common keys are the Delete key, F2 key, or Esc key, but this varies by manufacturer and model, so check the PC manual.
![]() Ken
Ken
Here is some additional information about BIOS/UEFI and boot device priority.
BIOS/UEFI is software built into the motherboard that manages the basic hardware settings of the computer.
When the PC is powered on, the BIOS/UEFI starts first, checks if the connected hardware is working properly, and then searches for and prepares to boot the OS.
When a computer starts, the BIOS searches for the storage device containing the OS and executes the OS.
If multiple storage devices are connected, the order in which the BIOS/UEFI searches for the OS can be set as the “boot device priority”.
Usually, there is only one storage device with the OS, so there is no need to change the priority.
Also, if there is no existing OS and a new OS is being installed, there is usually only one storage device, so there is no problem.
However, if a USB flash drive with installation media is inserted while an existing OS is installed, the existing OS may boot instead of the installation media.
In such cases, it is necessary to set the boot device priority in advance.
In most cases, when installing a new OS, changing the priority is not necessary, but since the installation environment differs for each user, the steps are included to handle various situations.
![]() Ken
Ken
Change the Boot Device Priority
After entering the BIOS/UEFI screen, look for the “Boot” tab or similar, and find the option to set the boot order.
There will be items such as “Boot #1”, “Boot #2”, “Boot #3”, etc., where devices can be set.
Set the USB flash drive or DVD drive with the installation media as the first boot device.
After changing the priority, save the BIOS/UEFI settings and restart.
The PC will restart automatically after saving, so there is no need to operate the power button.
Windows Setup and License Key Entry
Also, the monitor was photographed directly, so the image quality is poor.
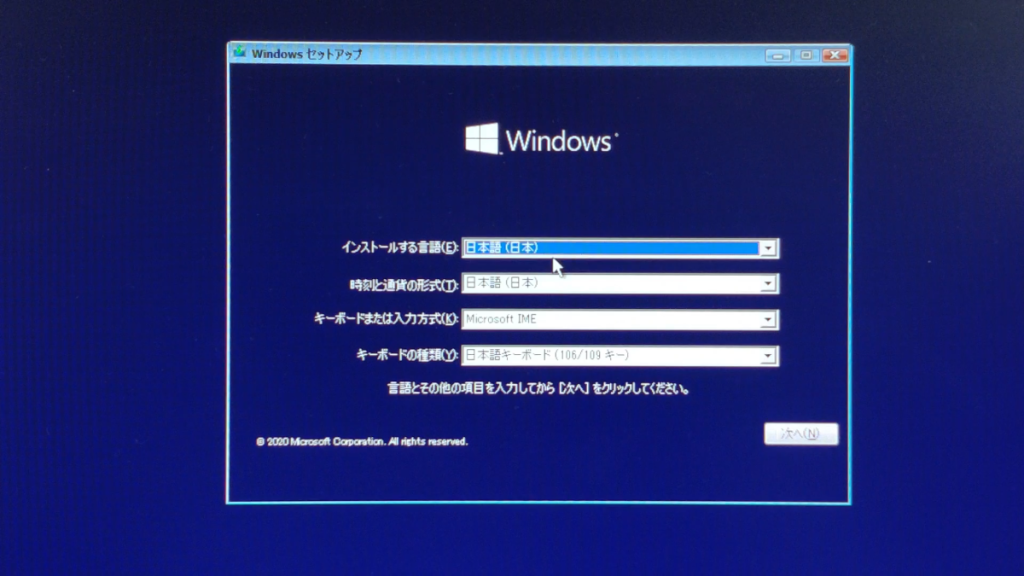
After restarting, the Windows OS setup screen will appear.
Follow the on-screen instructions to proceed with the installation.
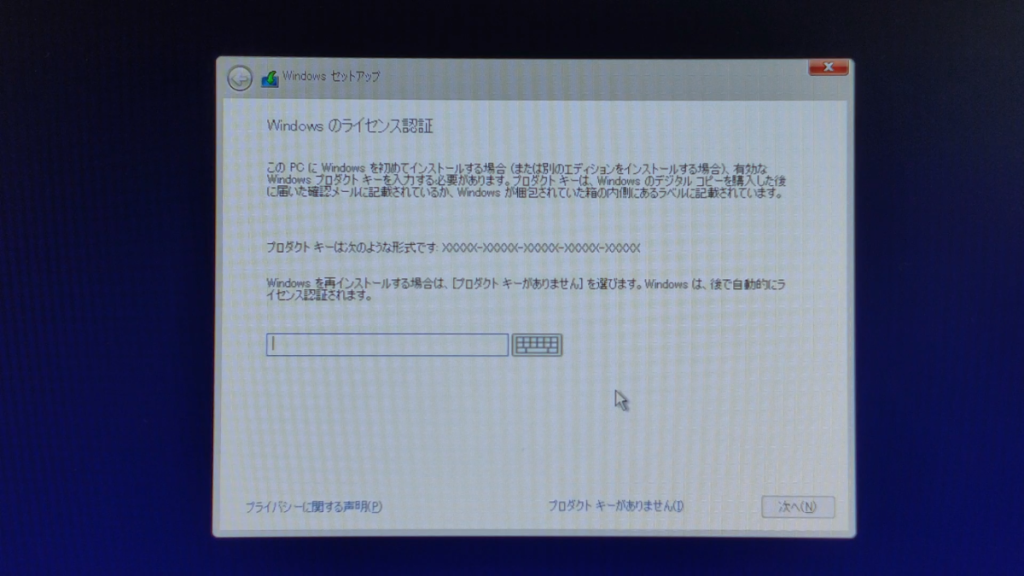
On the Windows license authentication screen, enter the license key.
The license key is usually provided when purchasing Windows, inside the box for the package version, or by email for the download version.
If the license key is not available, it can be entered later, but it is recommended to prepare and enter the license key at this stage.
Without a license, some features may not be available, support may not be provided, and notifications requesting license key entry will appear.
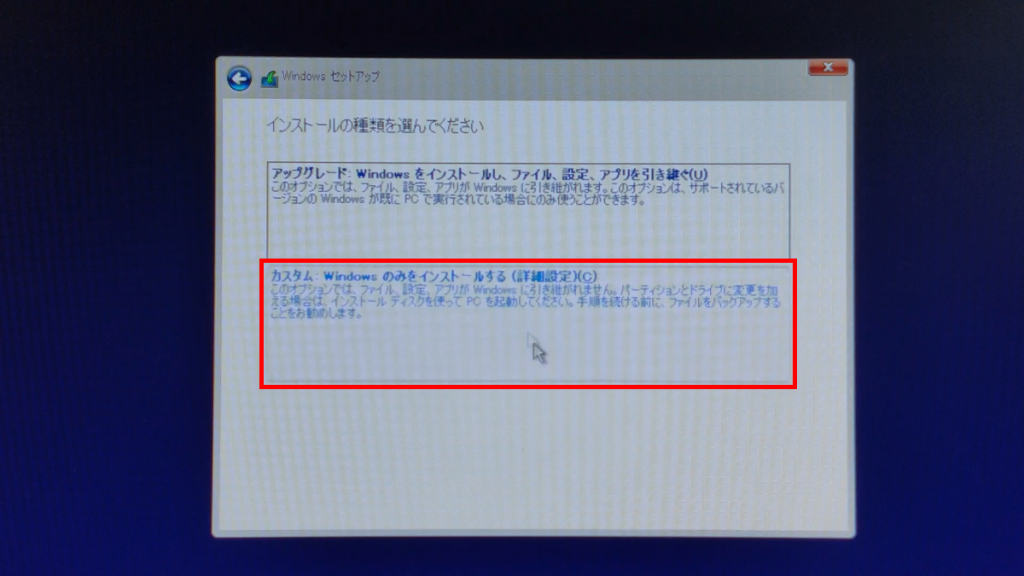
Next, choose how to install Windows.
Here, there are options such as normal installation, custom installation, or repair options.
(Repair options should appear if Windows OS is already installed.)
Normal installation is selected when reinstalling Windows while keeping existing data.
On the other hand, custom installation is selected when changing partitions or performing a clean install.
Repair options are used to fix system problems.
If installing Windows OS for the first time, select Custom Installation.
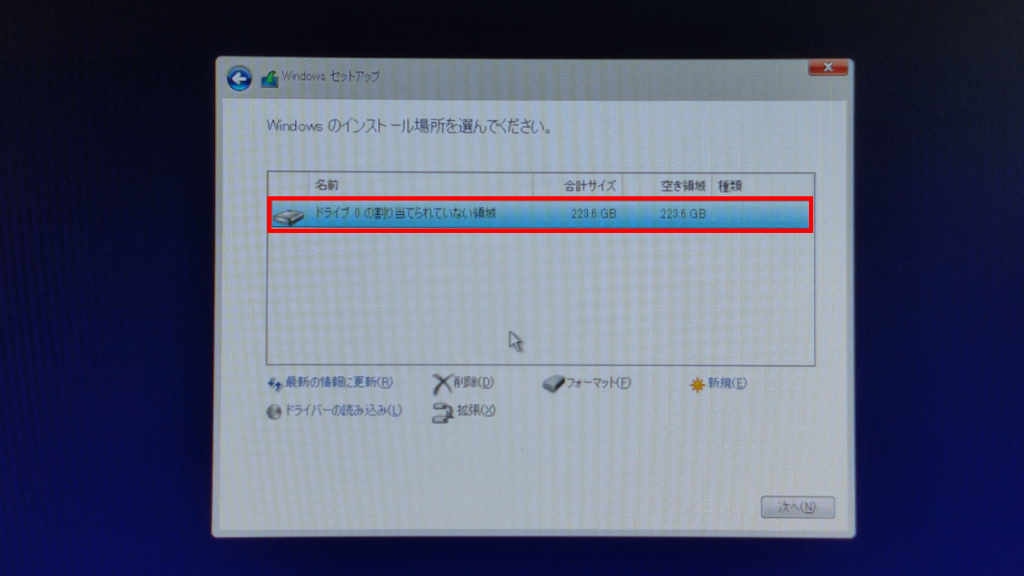
After selecting the storage to install to, the installation will begin.
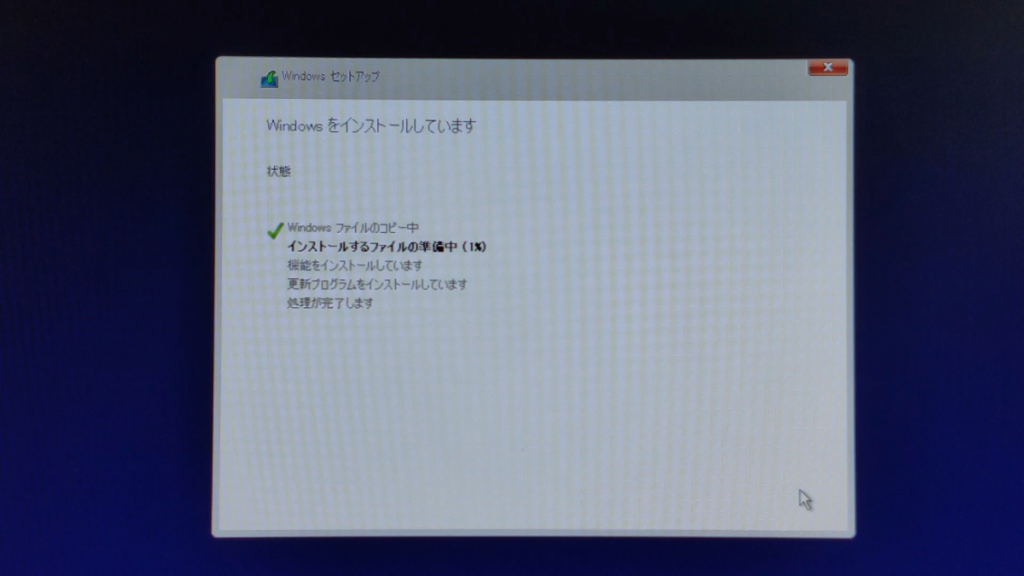
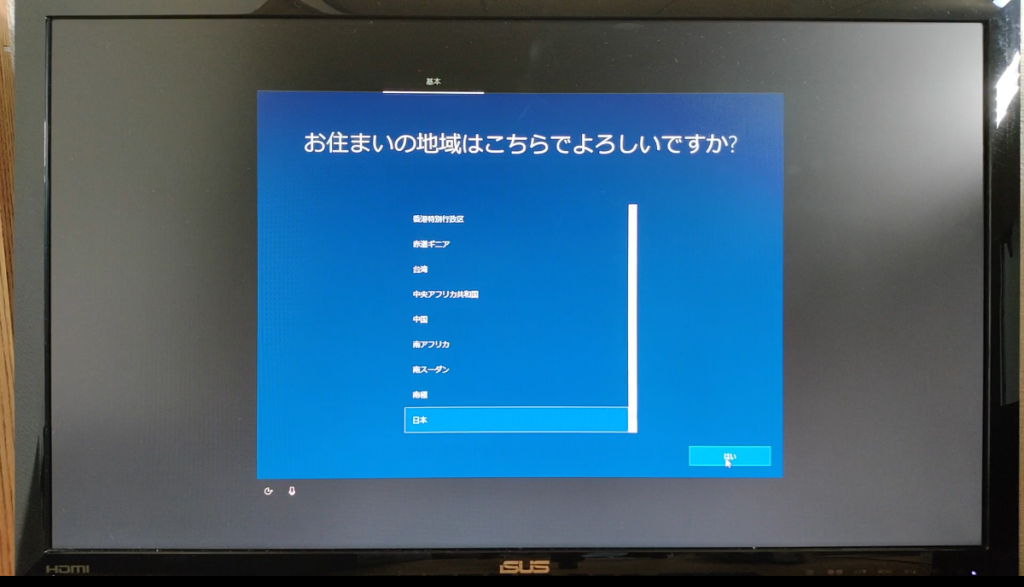
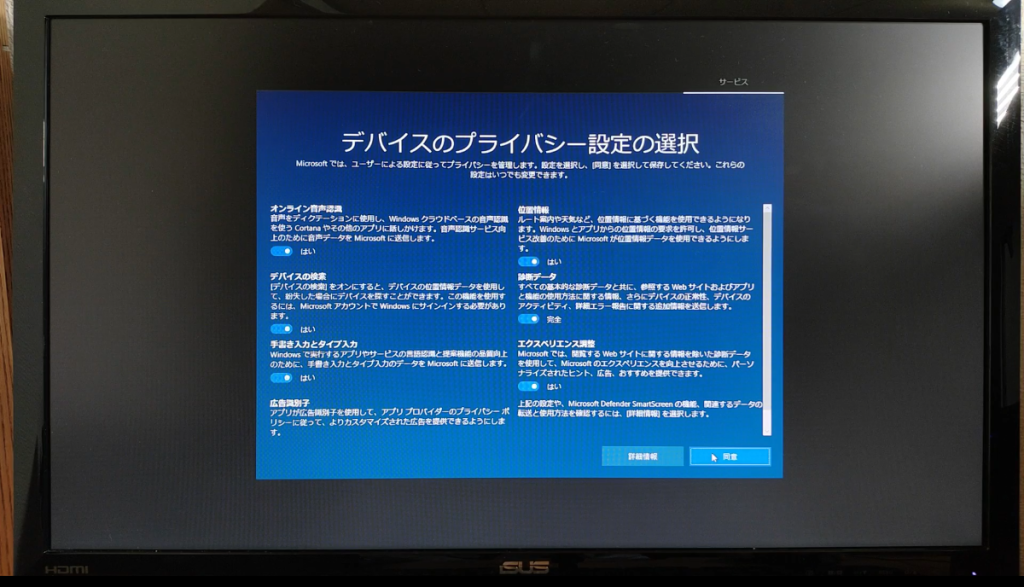
The following items are set after this:
- Region and language settings
- Keyboard layout settings
- Network settings
- Microsoft account settings
- Privacy settings
Some of these can be set later, so if unsure, the default settings are fine.
*The order and items to set may vary depending on the Windows version.
Initial Setup After Installation is Complete

After installation is complete, the usual desktop screen will appear.
After this, update Windows, set the screen resolution or configure dual displays if needed, install the browser you usually use, and install office software or security software if necessary.
Then, install the software or games you usually use.
Summary: Windows Installation Media is Needed When Installing from a USB Flash Drive
This article explained in detail the role, creation method, and usage of Windows installation media.
Here is a summary of the key points.
- Installation media refers to a USB flash drive or DVD that contains the files needed to install the OS
- Windows installation media is required when installing or reinstalling the OS
- It is possible to create installation media by yourself
- A separate license is required in that case
- A USB flash drive with at least 8GB of capacity is needed
If only a license key is available or if the installation media is only a DVD and cannot be used, it is possible to create installation media yourself and install the OS. Knowing how to create and use installation media is useful for handling various situations.
This article also explains general information about the OS, such as types, versions, editions, types of installation media, and license formats.
≫ Related article: How to Choose an OS for a Custom PC [Performance / Features / Compatibility]
Select PC parts and online stores to instantly generate an estimate, check compatibility, and calculate power requirements. You can save up to five different builds, making it easy to try out multiple configurations.
≫ Tool:PC Parts Estimation & Compatibility Check Tool