
Installing the motherboard back panel (I/O shield) is one of the more difficult tasks when building a custom PC, and there is a risk of cutting fingers and getting injured.
This article explains how to handle the back panel, including basic knowledge, how to install it, and how to remove it.
- The back panel is the interface hub for connecting external devices.
- The I/O shield is a metal panel that protects the rear ports of the motherboard.
- Motherboards with integrated back panels are easier and safer to install.
- The I/O shield is made of metal with sharp edges, so be careful not to cut your fingers.
- Proper force is necessary; forcing it in can cause damage.
- Check the orientation of the I/O shield carefully before installing.
This article also explains how to choose a motherboard based on standards, part names, performance, and compatibility.
≫ Related article: How to Choose a Motherboard for a Custom PC [Performance / Features / Compatibility]
Select PC parts and online stores to instantly generate an estimate, check compatibility, and calculate power requirements. You can save up to five different builds, making it easy to try out multiple configurations.
≫ Tool:PC Parts Estimation & Compatibility Check Tool
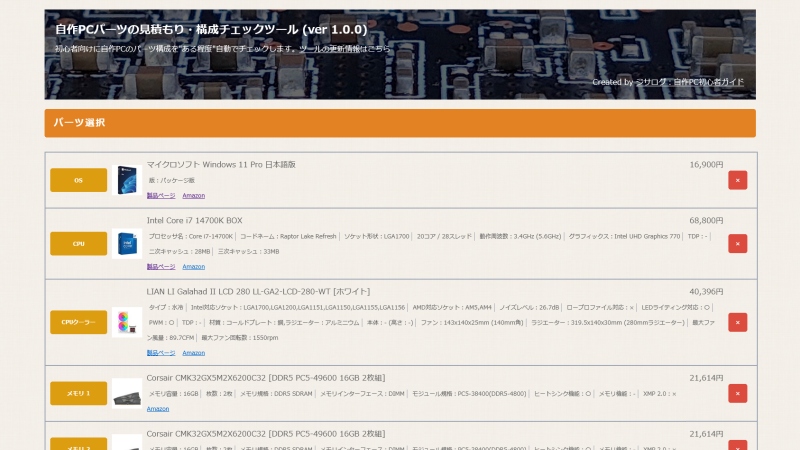
Table of Contents
- 1 About the Motherboard Back Panel
- 2 Why Installing the Motherboard Back Panel is Difficult
- 3 How to Install the Back Panel (I/O Shield)
- 3.1 Lay the PC Case on Its Side
- 3.2 Check the Orientation of the Back Panel (I/O Shield)
- 3.3 Align the I/O Shield with the I/O Slot on the PC Case
- 3.4 Press the Four Corners in Order
- 3.5 Press the Sides to Secure the Whole Shield
- 3.6 Check After Installation
- 3.7 Check the PC Case Spacers (Standoffs)
- 3.8 Place the Motherboard in the Case
- 3.9 Secure the Motherboard with Screws
- 4 How to Remove the Back Panel (I/O Shield)
- 5 Summary: Install the Back Panel “Patiently” and “Carefully”!
About the Motherboard Back Panel
First, let’s explain what a back panel is from the basics.
What is a Motherboard Back Panel?
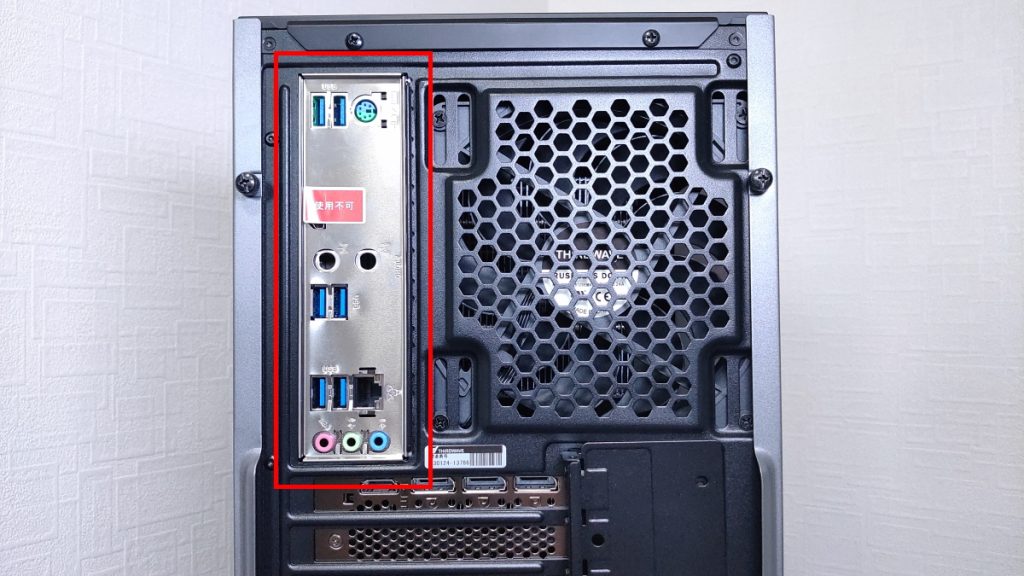
The back panel is located on the rear of the motherboard and is the area where interfaces for connecting external devices are concentrated.
Usually, USB ports, HDMI and DisplayPort video output terminals, LAN ports, and audio jacks are arranged here.
Through these ports, devices such as keyboards, mice, monitors, and LAN cables can be connected to operate the computer and communicate with external devices.
The types and number of interfaces on the back panel vary depending on the motherboard model, but for normal use, there are usually enough types and numbers provided.
Since the back panel comes out from the back of the PC case, there is a hole (I/O slot) in the PC case for this purpose.
The size of the back panel and I/O slot is basically standardized, so there is no need to worry about this when planning your PC parts.
![]() Ken
Ken
What is an I/O Shield?
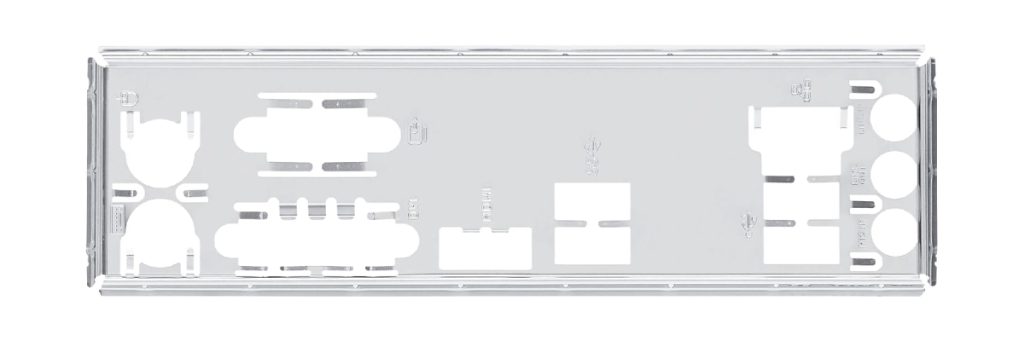
An I/O shield is a metal panel that protects the various ports (USB, HDMI, LAN, etc.) on the back of the motherboard and fits neatly into the back of the PC case.
“I/O” stands for “Input/Output,” referring to the terminals used to connect the computer to external devices.
![]() Ken
Ken
When building a custom PC, there is a step to install this I/O shield into the PC case.
This step comes just before installing the motherboard into the PC case, but surprisingly, this installation is one of the more difficult parts of building a custom PC.
Risk of Cutting Fingers on the I/O Shield
The I/O shield is designed to fit perfectly into the PC case, but sometimes it is too tight or slightly misaligned, making installation difficult.
Installing the I/O shield often requires some force, and forcing it in can cause the I/O shield to bend.
Also, because of sharp edges and tight spaces, there is a risk of slipping and cutting fingers.
Especially for those building a custom PC for the first time, it is common to hear stories of cutting fingers.
![]() Ken
Ken
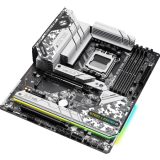
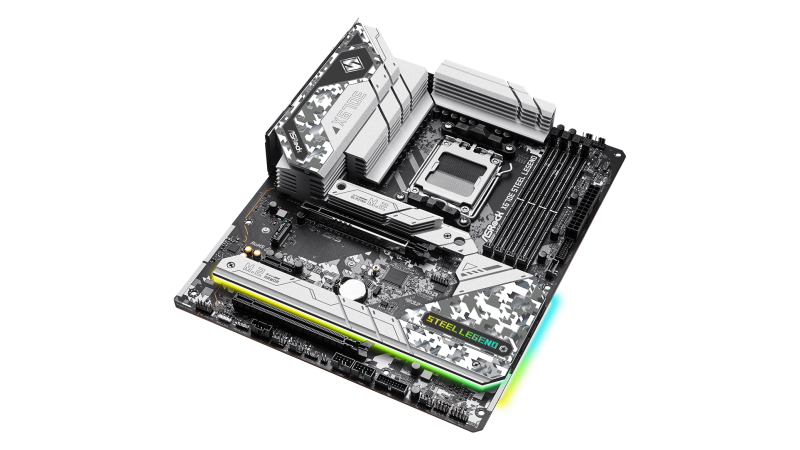
Consider Motherboards with Integrated Back Panels
Recently, more motherboards come with the back panel (I/O shield) already attached as an “integrated” type.
With the integrated type, there is no need to install the I/O shield separately, and simply fixing the motherboard to the case completes the work.
There is no worry about installation mistakes or panel misalignment, so the process goes very smoothly, and the risk of cutting fingers is greatly reduced.
This is especially recommended for those building a custom PC for the first time or those who are worried about assembly.
Why Installing the Motherboard Back Panel is Difficult
This section explains why installing the motherboard back panel is difficult.
The I/O Shield is Made of Metal with Sharp Edges
The I/O shield that comes with the motherboard is made of metal and is very hard, so it must be handled with care.
Special attention should be paid to the edges of the I/O shield.
There may be sharp burrs or edges left from the metal processing, which can cut your hands.
During detailed work, slipping or using too much force can lead to unexpected injuries.
To work safely, it is recommended to wear thin work gloves.
Anti-static gloves are also introduced as useful tools for building a custom PC, and these gloves can also reduce the risk of injury.
However, honestly, during detailed tasks like aligning and installing the I/O shield, it can be hard to feel the parts through gloves.
Therefore, whether to use gloves depends on your work style and experience.
Applying the Right Amount of Force is Difficult
The I/O shield is designed to fit perfectly into the I/O slot on the back of the case.
However, if the right amount of force is not applied, it may not be fixed properly and may remain loose or misaligned.
On the other hand, forcing it in too hard can bend the panel or even scratch the case or motherboard, so controlling the force is difficult.
Misalignment Between Motherboard and Case
A common issue when installing the motherboard is slight misalignment between the motherboard and the PC case.
If there is misalignment, it becomes difficult to fit the I/O shield correctly, hindering smooth assembly.
Ideally, the motherboard’s I/O ports and the case’s I/O slot should align perfectly through the I/O shield.
However, due to manufacturing tolerances and individual differences in cases and motherboards, slight misalignments can occur.
This is especially common in low-priced cases, where dimensional accuracy may vary.
Forcing the I/O shield in while it is misaligned can bend the shield or scratch the case, so be careful.
When installing, gently move the motherboard inside the case to fine-tune the position and find the point where the ports naturally fit into the I/O shield holes.
Adjusting the Position of the Metal Springs (Tabs) is Difficult
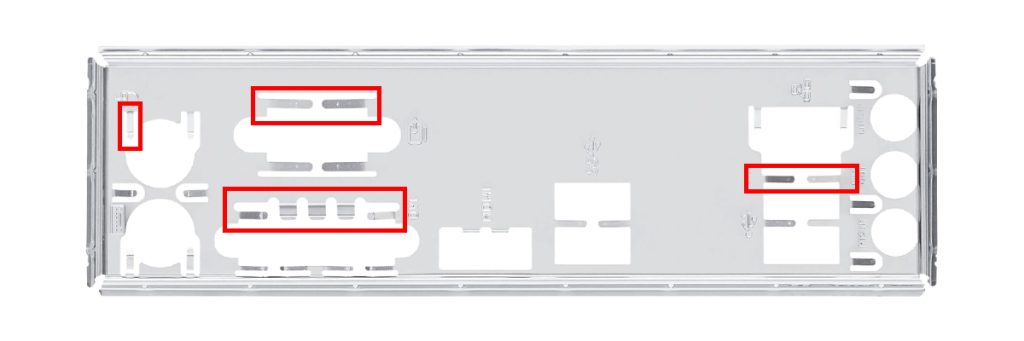
The I/O shield on the motherboard has small metal springs (tabs) around each port.
These are important structures to firmly fix the motherboard’s I/O ports and prevent wobbling.
However, if the motherboard is not installed with these metal springs in the correct position, the I/O ports may not fit properly.
Especially if the spring covers the port, it will push the port back, causing the back panel to float and making it difficult to install the motherboard.
Before installation, lightly check the direction and position of the springs, and if necessary, push them slightly inward for smoother installation.
Do not force it in; pay attention to the movement of the springs and work slowly and carefully.
How to Install the Back Panel (I/O Shield)
This section explains how to install the back panel (I/O shield) in simple steps.
- Lay the PC Case on Its Side
- Check the Orientation of the Back Panel (I/O Shield)
- Align the I/O Shield with the I/O Slot on the PC Case
- Press the Four Corners in Order
- Press the Sides to Secure the Whole Shield
- Check After Installation
- Check the PC Case Spacers (Standoffs)
- Place the Motherboard in the Case
- Secure the Motherboard with Screws
Lay the PC Case on Its Side
When installing the I/O shield or motherboard, it is easier to work if the PC case is placed on a flat surface and laid on its side for stability.
If the PC case is left standing, it will be less stable, and applying force when installing the I/O shield increases the risk of the case tipping over.
![]() Ken
Ken
Check the Orientation of the Back Panel (I/O Shield)
The I/O shield is rectangular, so it is possible to install it upside down.
If you try to install it backwards, you will notice during the process that it cannot be installed as is.
If the I/O shield is installed in the wrong direction, the ports cannot be used, and the motherboard may not fit into the case.
Therefore, temporarily place the motherboard in the case to check the direction of the ports, then confirm the orientation of the I/O shield.
![]() Ken
Ken
Align the I/O Shield with the I/O Slot on the PC Case
First, align the I/O shield with the I/O slot on the back of the PC case.
At this time, the I/O shield is inserted from the inside of the case toward the outside.
Press the Four Corners in Order
Once aligned, lightly press the four corners of the I/O shield in order.
Do not try to press the whole thing at once; press each corner one by one with even force to ensure it fits securely.
Press the Sides to Secure the Whole Shield
After pressing in the four corners, the sides may still be floating.
Therefore, lightly press the sides as well to ensure the entire I/O shield is flush with the case.
Do not use excessive force; work while feeling for the “click” as it fits into place.
Check After Installation
After installation, lightly press the entire I/O shield to check for looseness or gaps.
If any part is floating or not securely fixed, press it again to secure it properly.
If it is not installed securely at this stage, the motherboard ports may be misaligned later, or the motherboard itself may not be installable.
Check the PC Case Spacers (Standoffs)
Once the I/O shield is installed, it is time to install the motherboard itself into the case.
This step is easier than installing the I/O shield, as it does not require as much force.
First, check that the spacers (standoffs) for fixing the motherboard are installed in the correct positions inside the case.
Spacers are screw bases that allow the motherboard to be fixed without being screwed directly to the case, keeping it elevated.
If the holes in the motherboard and the positions of the spacers in the case do not match, the motherboard cannot be installed and may become unstable.
Therefore, temporarily place the motherboard in the case to check if the spacer positions match.
If you need to install the spacers yourself, attach them to the case in the same positions as the holes in the motherboard.
Place the Motherboard in the Case
After checking the spacers, carefully insert the motherboard into the case.
At this time, make sure the I/O ports fit neatly into the holes of the I/O shield installed earlier.
If the positions do not align, do not force it in; adjust the angle and position as needed.
Secure the Motherboard with Screws
After confirming that the I/O ports on the motherboard fit correctly into the I/O shield, secure the motherboard to the spacers with the included screws.
Tighten the screws diagonally in order to distribute the force evenly and prevent misalignment.
Over-tightening can damage the board, so tighten just until it stops, using light force.
Once the screws are in, the motherboard installation is complete.
Check again to make sure there is no wobbling.
How to Remove the Back Panel (I/O Shield)
This section explains how to remove the back panel (I/O shield) in simple steps.
If the I/O shield is only partially installed or if you notice it is in the wrong direction when installing the motherboard, you may need to remove it, so it is good to know how.
Lay the PC Case on Its Side
As with installation, place the PC case on a flat surface and lay it on its side for stability.
If the PC case is left standing, it will be less stable, and applying force when removing the I/O shield increases the risk of the case tipping over.
Lightly Press the Corner of the I/O Shield from the Back of the PC Case
When removing the I/O shield, the basic method is to push it out from the back (outside) of the PC case toward the inside.
Since the I/O shield is usually firmly fitted into the case opening, do not try to forcibly pull it out; instead, press out each corner little by little.
By applying light pressure to the corners of the panel from the back of the case, it will start to pop out.
At this time, do not use excessive force; press several corners little by little to remove the entire panel slowly.
When the tabs of the I/O shield come off, the back panel will lift slightly.
At this point, do not use force; gently push out the back panel.
Be careful, as the metal edges are sharp and can cause injury.
Summary: Install the Back Panel “Patiently” and “Carefully”!
This article explained the overview and installation method of the motherboard back panel.
Here is a summary of the key points:
- The back panel is the interface hub for connecting external devices.
- The I/O shield is a metal panel that protects the rear ports of the motherboard.
- Motherboards with integrated back panels are easier and safer to install.
- The I/O shield is made of metal with sharp edges, so be careful not to cut your fingers.
- Proper force is necessary; forcing it in can cause damage.
- Check the orientation of the I/O shield carefully before installing.
Installing the motherboard back panel (I/O shield) is one of the most difficult steps in building a custom PC.
Because it is made of metal with sharp edges and requires delicate force, rushing the process can lead to finger injuries or damaged parts.
When working, make sure the PC case is stable, check the orientation and position of the I/O shield and springs, and press it in carefully without using too much force.
Also, recently, motherboards with integrated back panels have become more common, so those who want to reduce the hassle and risk of injury may consider this option.
The important thing is to work “patiently” and “carefully.”
By proceeding step by step, the risk of injury or part damage can be reduced.
Even beginners can work safely by following the points introduced in this article.
This article also explains how to choose a motherboard based on standards, part names, performance, and compatibility.
≫ Related article: How to Choose a Motherboard for a Custom PC [Performance / Features / Compatibility]
Select PC parts and online stores to instantly generate an estimate, check compatibility, and calculate power requirements. You can save up to five different builds, making it easy to try out multiple configurations.
≫ Tool:PC Parts Estimation & Compatibility Check Tool