
This article explains the key points and specific methods for deciding where to place a custom-built PC.
Some may think that it does not matter where a computer is placed, but if a PC is not placed properly, cooling performance may decrease, which can affect performance and even shorten the lifespan of the PC.
In conclusion, if the goal is to display a carefully assembled custom PC, it is best to place the desk so that the PC is on the right side of the desk, with walls on the right and behind to prevent it from falling during earthquakes or shaking.
If safety and desk space are a priority, placing the PC next to the desk is recommended.
- Choose a stable location (especially important when placing on a desk)
- Leave enough space around the PC to maintain cooling performance
- Avoid direct sunlight to prevent temperature rise and deterioration
- If the PC should be visible, the right side of the desk is recommended
- However, the desk should be arranged so that the right side is against a wall
- If desk space or safety is important, placing the PC next to the desk is recommended
This article also explains the basics of choosing a PC case, including knowledge about manufacturers and sizes, as well as performance and compatibility considerations.
≫ Related Article: How to Choose a Custom PC Case [Performance / Functionality / Compatibility]
Select PC parts and online stores to instantly generate an estimate, check compatibility, and calculate power requirements. You can save up to five different builds, making it easy to try out multiple configurations.
≫ Tool:PC Parts Estimation & Compatibility Check Tool
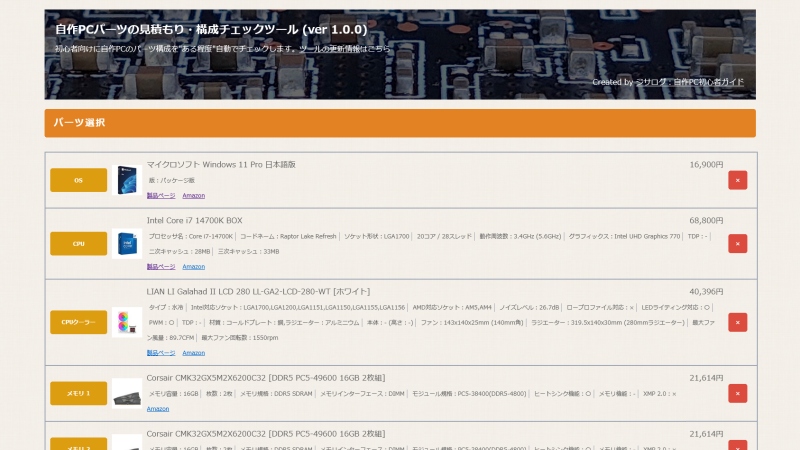
Table of Contents
About Placement and Positioning of Custom PC Cases
Before explaining specific placement methods, here are the key points to consider when choosing where to place a custom PC.
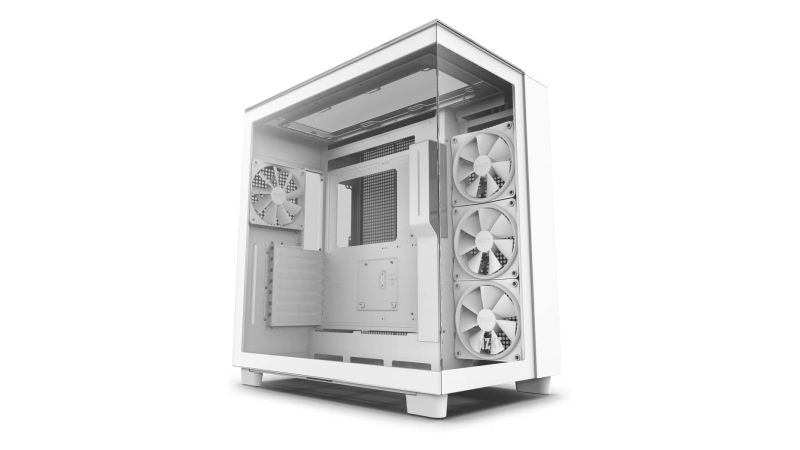
Place on a Stable Surface
Custom PCs usually weigh between 5 and 20 kg, so it is important to place them on a stable surface.
A stable surface reduces the risk of the PC case falling over or internal parts being damaged by vibration.
Generally, PCs are placed on top of the desk, on the floor, or next to the desk, but each location has its own advantages and disadvantages.
If the custom PC has a stylish design, it may be tempting to place it on the desk where it can be seen easily.
However, considering the possibility of earthquakes, it may be better to place it on the floor or in a lower position.
Therefore, it is necessary to consider both the key points and countermeasures for disadvantages when deciding where to place the PC.
Specific placement methods, including countermeasures, will be explained later.
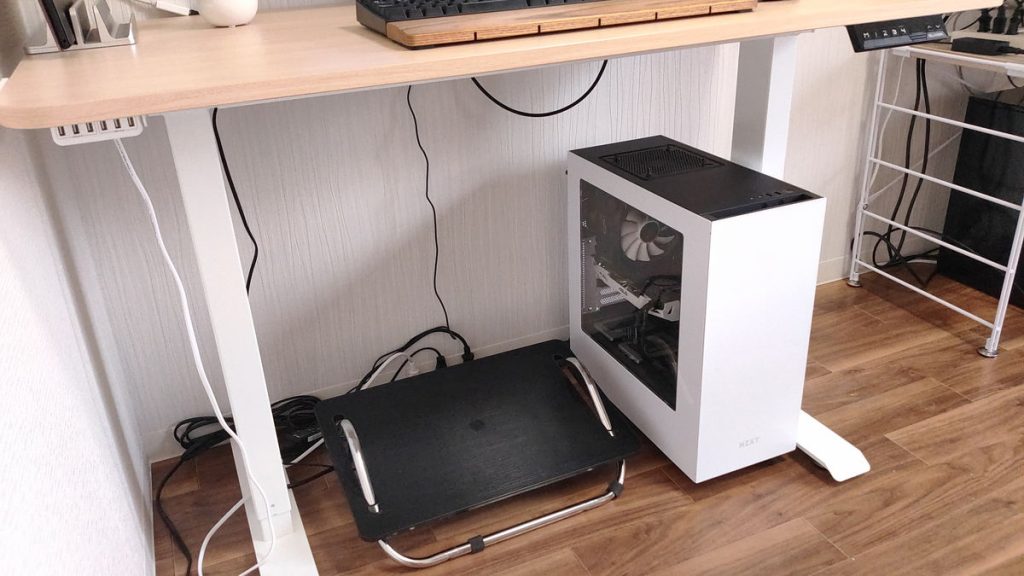
Leave Space Around the PC for Good Airflow
Example of Poor Airflow (NG)
Example of Good Airflow (OK)
Custom PCs usually have exhaust fans at the back, so it is important to leave enough space around the PC to allow heat to escape and maintain good airflow.
If heat builds up, the internal temperature of the PC will rise, and the CPU or GPU may not be able to perform at their best, or may not maintain stable performance due to overheating.
Also, if the PC stays hot for a long time, it may become unstable or the internal parts may have a shorter lifespan.
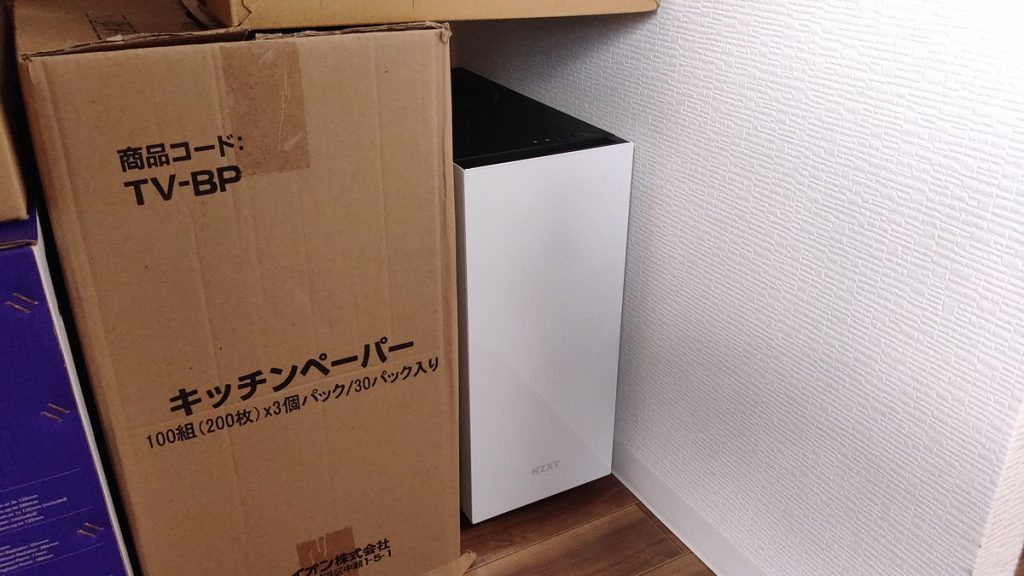
For example, if a custom PC is placed in a shelf surrounded on all sides except the front, or if the exhaust vent is too close to the wall, heat cannot escape properly.
Some PC cases have intake vents on the side panels, so in that case, the sides of the PC should not be too close to the wall.
Even if the front has an intake vent, it is not good to place the PC too close to the wall. In that case, the only way for air to escape from the rear exhaust is upward, which is not good for airflow.
![]() Ken
Ken
Therefore, leave at least about 5 cm of space around the PC to prevent heat buildup.
By choosing the right place for a custom PC, it is possible to maintain performance and extend its lifespan.
Avoid Direct Sunlight
Avoiding direct sunlight is very important when choosing where to place a custom PC case.
If a PC case is placed in direct sunlight, the internal temperature can rise rapidly, which can shorten the lifespan of the parts.
Especially in summer, room temperature rises, and direct sunlight can make the PC even hotter.
Ultraviolet rays from direct sunlight can also deteriorate the exterior of the PC case, internal cables, and plastic parts.
This not only affects the appearance, but can also impact performance and safety.
Also, white or light-colored PC cases may become discolored or yellowed by sunlight, while black PC cases may absorb heat and have their performance affected.
Heat is less of a problem in winter, but in summer, using the PC for high-load tasks like 3D gaming in direct sunlight can be concerning.
When choosing a place for a custom PC, avoid placing it near windows or in places where sunlight hits directly, and choose a cool, well-ventilated spot.
This will help maximize PC performance and keep it running stably for a long time.
If possible, avoid placing the PC near windows with direct sunlight, or use Blackout curtains to block the sunlight if there is no other option.
Place Near a Power Outlet
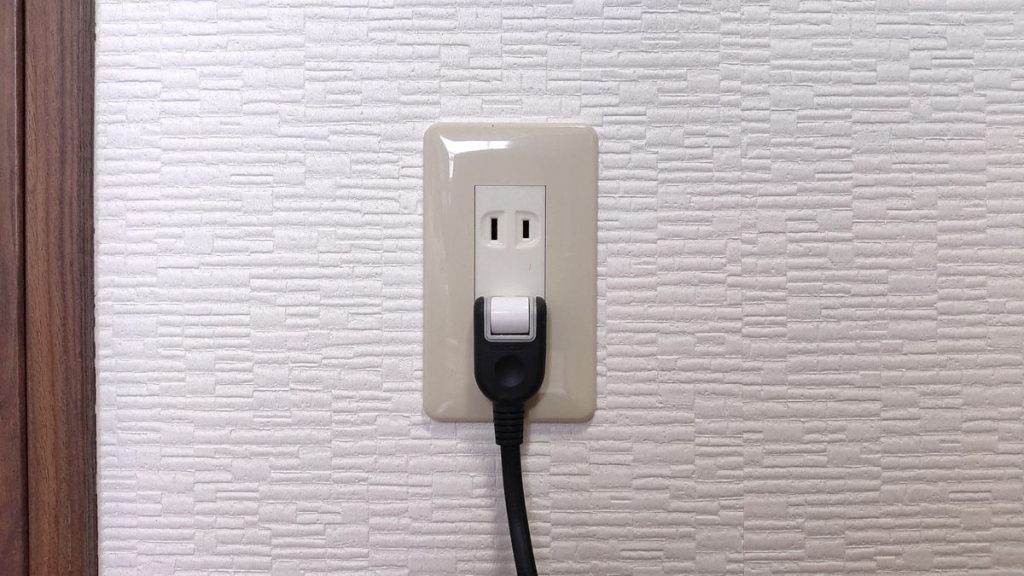
It may seem obvious, but a custom PC needs to be connected to a power cable, so it is best to place it near a power outlet.
Most power cables are about 2 meters long, so depending on the placement, the cable may not reach the wall outlet.
Also, for a custom PC, at least two outlets are needed for the PC and monitor, and even more if using dual monitors or a printer.
If there are not enough outlets even when placing the PC near the wall, using a simple power strip is recommended.
It is best to prepare a power strip power strip with a length of at least 5 meters and at least 5 outlets.
Common Custom PC Placement Methods
Based on the key points and cautions for placing a custom PC, here are some common placement methods.
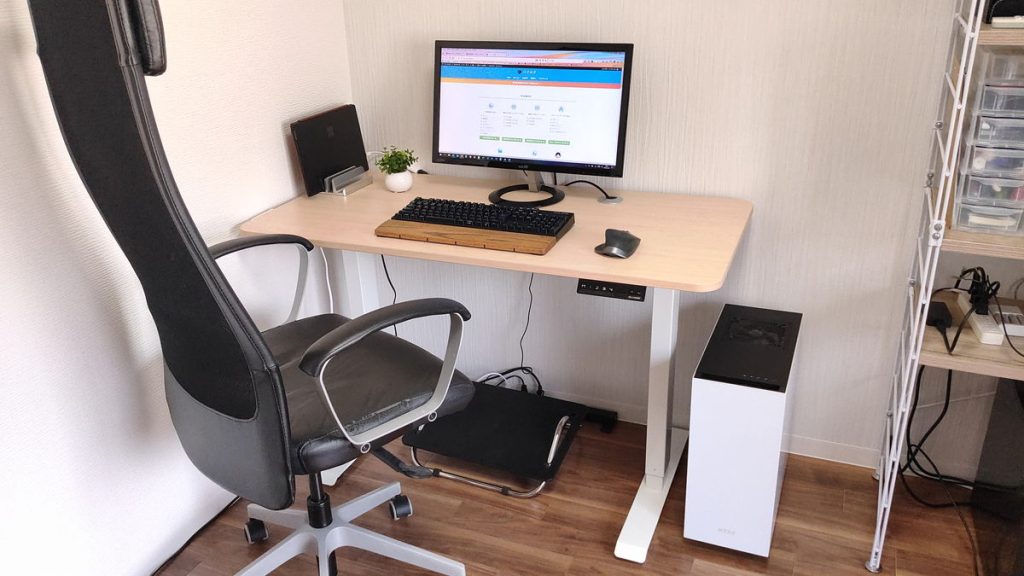
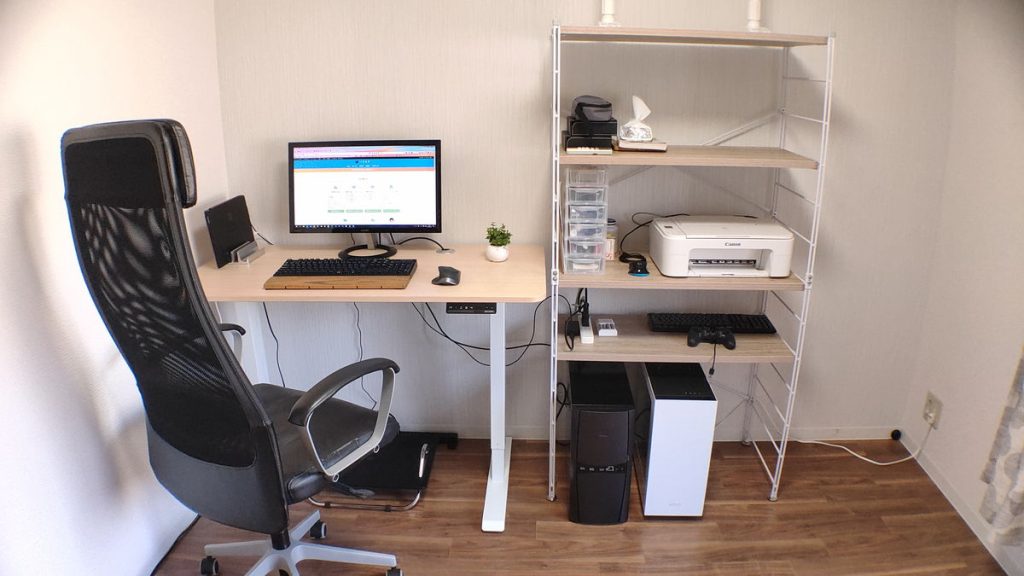
Placing on Top of the Desk

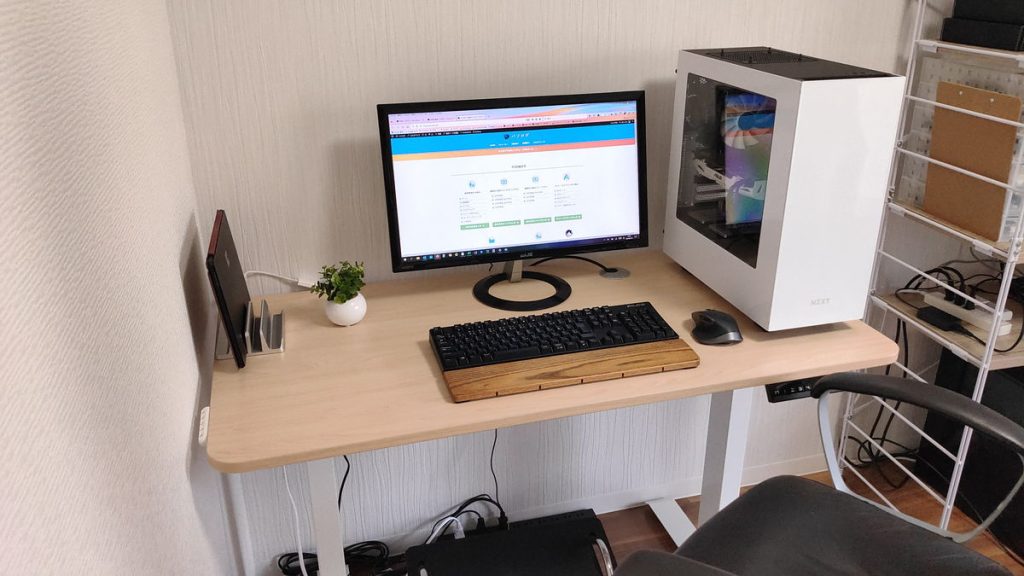
- The custom PC, assembled with care, can be displayed and seen.
- There is a risk of the PC falling during an earthquake.
- Basically, the PC should be placed on the right side of the desk
- Ports are recommended to be on the front, not the top
With a custom PC, the case design can be personalized with tempered glass or LED lighting, making it visually appealing.
Therefore, the right side of the desk is the best place to display the PC.
![]() Ken
Ken
However, this setup can feel cramped, so a fairly large desk is needed, and it is basically limited to placing the PC on the right side of the desk.
Cases with tempered glass or acrylic panels usually have a transparent left side, so the PC must be placed on the right edge of the desk to see the inside.
If the case does not have tempered glass and both sides are the same, it can be placed on either side.
However, some PC cases have USB ports or power buttons on the left or right, so be careful when choosing the side.
When placing the PC on the desk, if the USB ports and other interfaces are on the top, it can be hard to find or use them, so it is better if they are on the front.
Also, as shown in the images, there is a risk of the PC falling to the right during an earthquake, so it is better to arrange the desk so that the right side is against a wall.
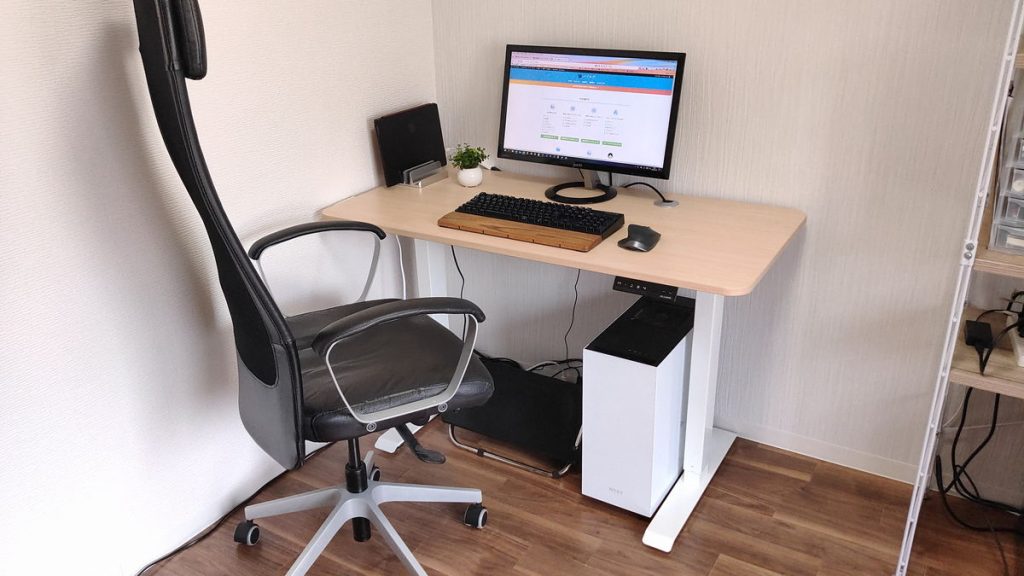
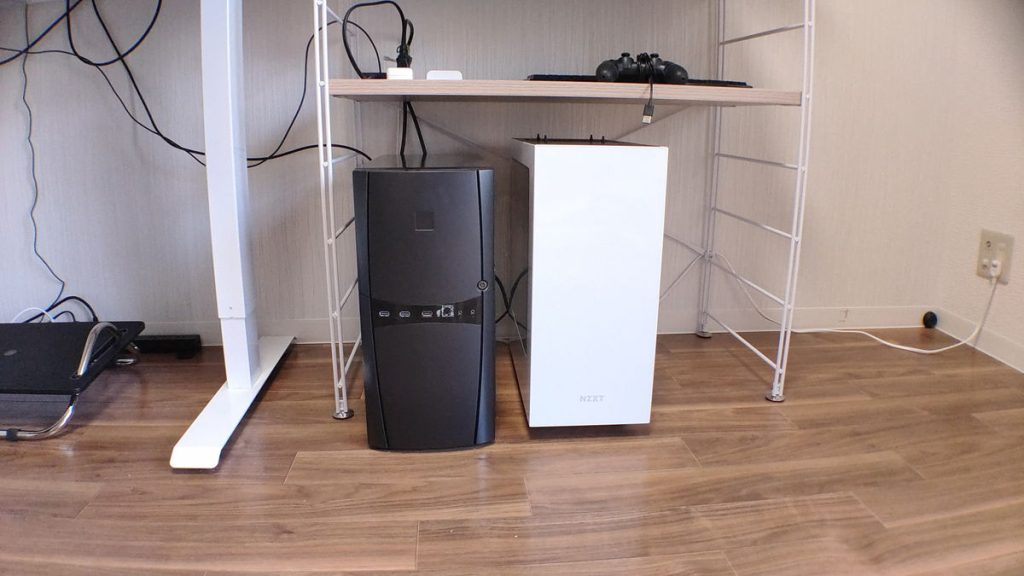
Placing Next to the Desk
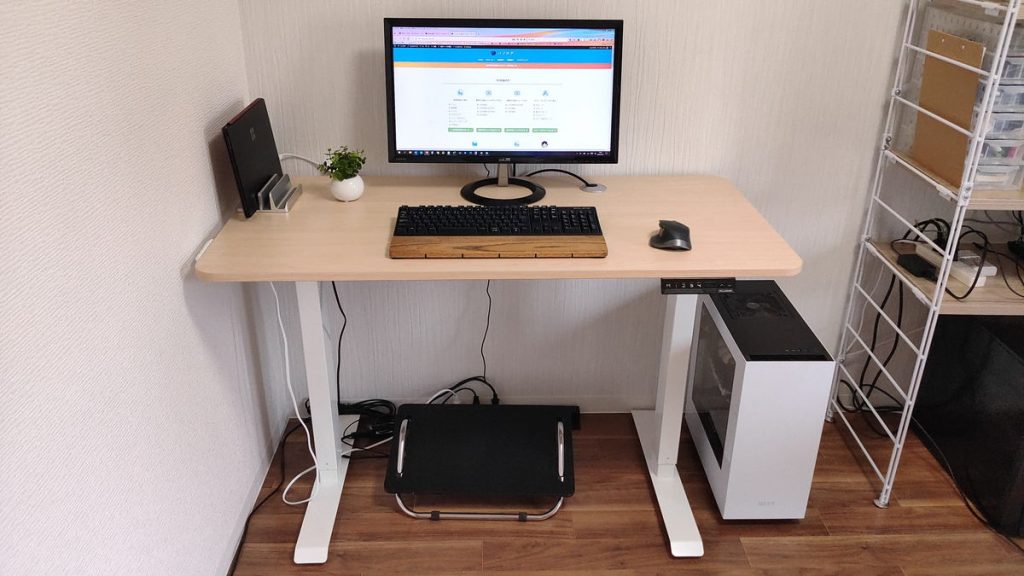
- More desk space is available
- USB ports and other interfaces are easier to use
- Feet will not bump into the PC
- The custom PC cannot be enjoyed visually
- There is a risk of dust being sucked in from the floor
- Ports are recommended to be on the top or upper front
Placing a custom PC next to the desk is safer and more convenient than placing it on the desk.
![]() Ken
Ken
By placing the PC case next to the desk, workspace can be used more efficiently.
Placing the PC on the desk takes up space and can get in the way.
Also, placing the PC next to the desk makes it easier to reach USB ports and the power button.
When choosing a PC case, it is better if the interfaces are on the top or upper front.
If the interfaces are on the lower front, it can be hard to reach them without changing position.
However, placing the PC next to the desk means the carefully assembled case cannot be seen easily, which can be disappointing.
Also, if the PC is placed directly on the floor, dust can accumulate, so regular cleaning is necessary.
Placing Under the Desk
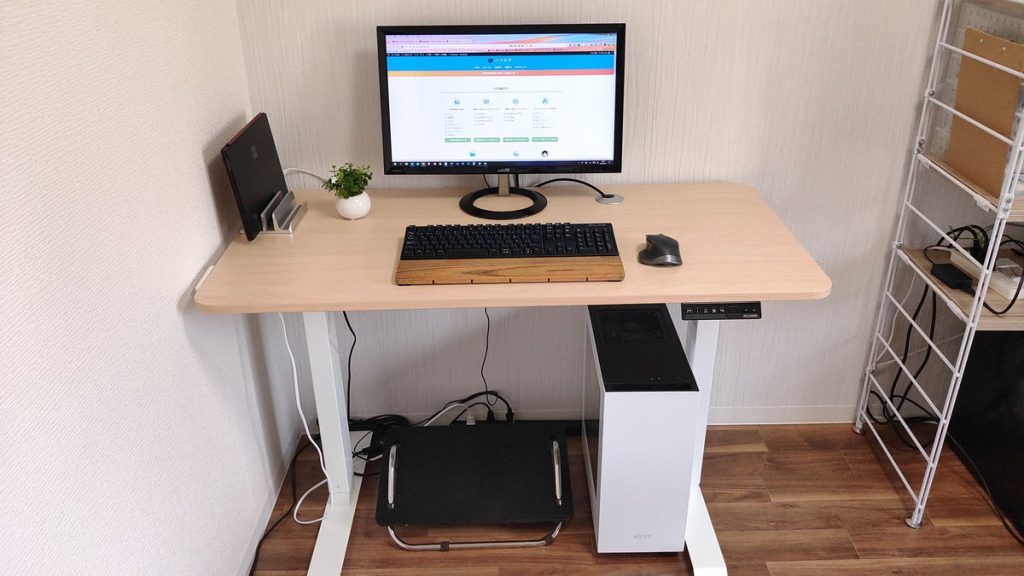
- More desk space is available
- USB ports and other interfaces are easier to use
- The custom PC cannot be enjoyed visually
- There is a risk of dust being sucked in from the floor
- Less space for feet
- Ports are recommended to be on the top or upper front
This method places the custom PC under the desk, near the feet.
This is only possible if there is no desk wagon and the desk legs do not get in the way, leaving enough space under the desk.
Placing the custom PC under the desk can make the whole room look tidy.
However, if feet hit the PC when moving or if the chair hits it when rotating, this method is not recommended.
In desks like the one in the image, the legs are set inward, so the PC is placed further inside, which can make the foot space narrower or shifted to the left.
Also, since the PC is under the desk, it is easier to use if the power button and USB ports are on the upper front or top. When choosing a PC case, keep this in mind.
If the interfaces are on the lower front, it is hard to turn on the PC or insert a USB stick while sitting.
Also, if the PC is placed directly on the floor, dust can accumulate, so regular cleaning is necessary, just like when placing the PC next to the desk.
Special Custom PC Placement Methods
This section explains special placement methods other than the common ones.
Placing Multiple Custom PCs
For those who have multiple custom PCs, it is recommended to use a PC Rack rack for storage.
With common placement methods, two PCs may be placed side by side next to the desk, or one under the desk and one next to the desk.
However, placing two PCs side by side next to the desk wastes the space above the PCs and can make the room feel cramped, and placing one under the desk does not look tidy.
By using a rack, two or three PCs can be placed together, and with two or three shelves, stationery, printers, and other peripherals can also be stored, making it a recommended option.
For Small Custom PCs [Behind the Monitor]
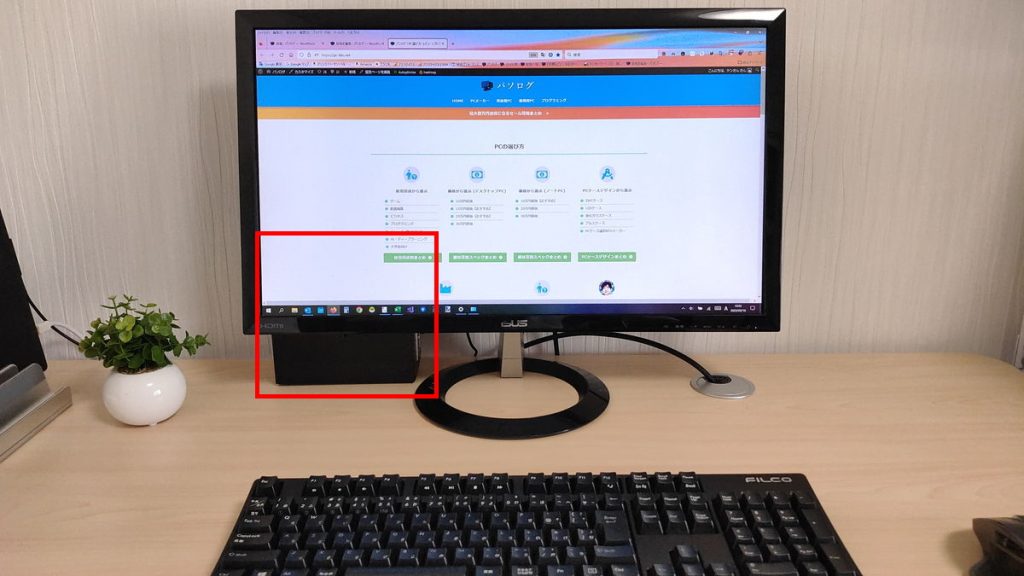
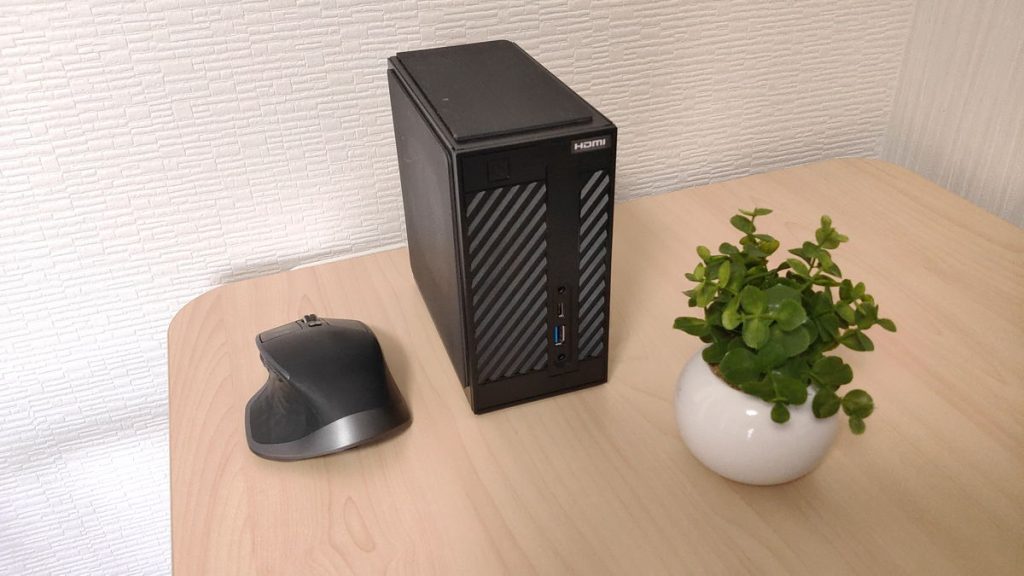

Palm-sized PC cases are rare, but by using a barebone kit like DeskMini, it is possible to build a mini PC like this.
A barebone kit is a kit with basic parts pre-installed.
Usually, it includes a motherboard, power supply, and sometimes a CPU and CPU cooler, but memory, storage, and OS are often not included.
With this size, the PC does not get in the way even on the desk, and it is possible to use space efficiently by placing it behind the monitor.
If both the case and monitor support the VESA mount standard (*), the PC can be attached to the back of the monitor.
This way, the PC is completely hidden behind the monitor, keeping the desk tidy.
*The VESA standard allows monitor arms and other accessories to be attached to monitors.
Summary: For Looks, Place on Desk; For Stability, Place Under or Next to Desk!
This article explained the key points and specific methods for deciding where to place a custom PC.
Here is a summary of the most important points.
- Choose a stable location (especially important when placing on a desk)
- Leave enough space around the PC to maintain cooling performance
- Avoid direct sunlight to prevent temperature rise and deterioration
- If the PC should be visible, the right side of the desk is recommended
- However, the desk should be arranged so that the right side is against a wall
- If desk space or safety is important, placing the PC next to the desk is recommended
Choosing a stable location is very important, as shaking from earthquakes or bumping into the desk can cause the PC to fall or break.
Also, avoiding direct sunlight and leaving enough space around the PC is important for maintaining performance, so keep this in mind as well.
It is understandable to want to display a carefully assembled custom PC, but if there is no wall next to it, there is a risk of it falling during an earthquake, so be careful with desk placement.
Even if the PC is placed on the floor, there is still a risk of it falling over, but it is less dangerous than falling from a high place.
Each placement method has its own advantages and disadvantages, so choose the one that suits individual needs.
Also, the usability of USB ports and other interfaces changes depending on the placement, so once the placement is decided, choose a PC case that matches it.
This article also explains the basics of choosing a PC case, including knowledge about manufacturers and sizes, as well as performance and compatibility considerations.
≫ Related Article: How to Choose a Custom PC Case [Performance / Functionality / Compatibility]
Select PC parts and online stores to instantly generate an estimate, check compatibility, and calculate power requirements. You can save up to five different builds, making it easy to try out multiple configurations.
≫ Tool:PC Parts Estimation & Compatibility Check Tool